Druid 介绍
Druid首先是一个数据库连接池。Druid是目前最好的数据库连接池,在功能、性能、扩展性方面,都超过其他数据库连接池,包括DBCP、C3P0、BoneCP、Proxool、JBoss DataSource。Druid已经在阿里巴巴部署了超过600个应用,经过一年多生产环境大规模部署的严苛考验。Druid是阿里巴巴开发的号称为监控而生的数据库连接池!
Druid是一个JDBC组件,它包括三个部分:
基于Filter-Chain模式的插件体系。 DruidDataSource 高效可管理的数据库连接池。 SQLParser Druid 整个项⽬由数据库连接池、插件框架和 SQL 解析器组成,该项⽬主要是为了扩展 JDBC 的⼀些限制,可以让程序员实现⼀些特殊的需求,⽐如向密钥服务请求凭证、统计SQL 信息、SQL 性能收集、SQL 注⼊检查、SQL 翻译等,程序员可以通过定制来实现⾃⼰需要的功能。
Druid 可以做什么
替换其他 Java 连接池,Druid 提供了⼀个⾼效、功能强⼤、可扩展性好的数据库连接池。
可以监控数据库访问性能,Druid 内置提供了⼀个功能强⼤的 StatFilter 插件,能够详细统计 SQL 的执
⾏性能,这对于线上分析数据库访问性能有很⼤帮助。
数据库密码加密。直接把数据库密码写在配置⽂件中,这是不好的⾏为,容易导致安全问题,
DruidDruiver 和 DruidDataSource 都⽀持 PasswordCallback。
SQL 执⾏⽇志,Druid 提供了不同的 LogFilter,能够⽀持 Common-Logging、Log4j 和 JdkLog,可以
按需要选择相应的 LogFilter,监控应⽤的数据库访问情况。
扩展 JDBC,如果你要对 JDBC 层有编程的需求,可以通过 Druid 提供的 Filter 机制,很⽅便编写
JDBC 层的扩展插件。
Spring Boot 集成 Druid
⾮常令⼈⾼兴的是,阿⾥为 Druid 也提供了 Spring Boot Starter 的⽀持。官⽹这样解释:Druid Spring Boot
Starter ⽤于帮助你在 Spring Boot 项⽬中轻松集成 Druid 数据库连接池和监控。
Druid Spring Boot Starter 主要做了哪些事情呢?其实这个组件包很简单,主要提供了很多⾃动化的配置,按照 Spring Boot 的理念对很多内容进⾏了预配置,让我们在使⽤的时候更加的简单和⽅便。
下面有一个小案例,使用druid作为配置源,并访问监控页面,整体结构如下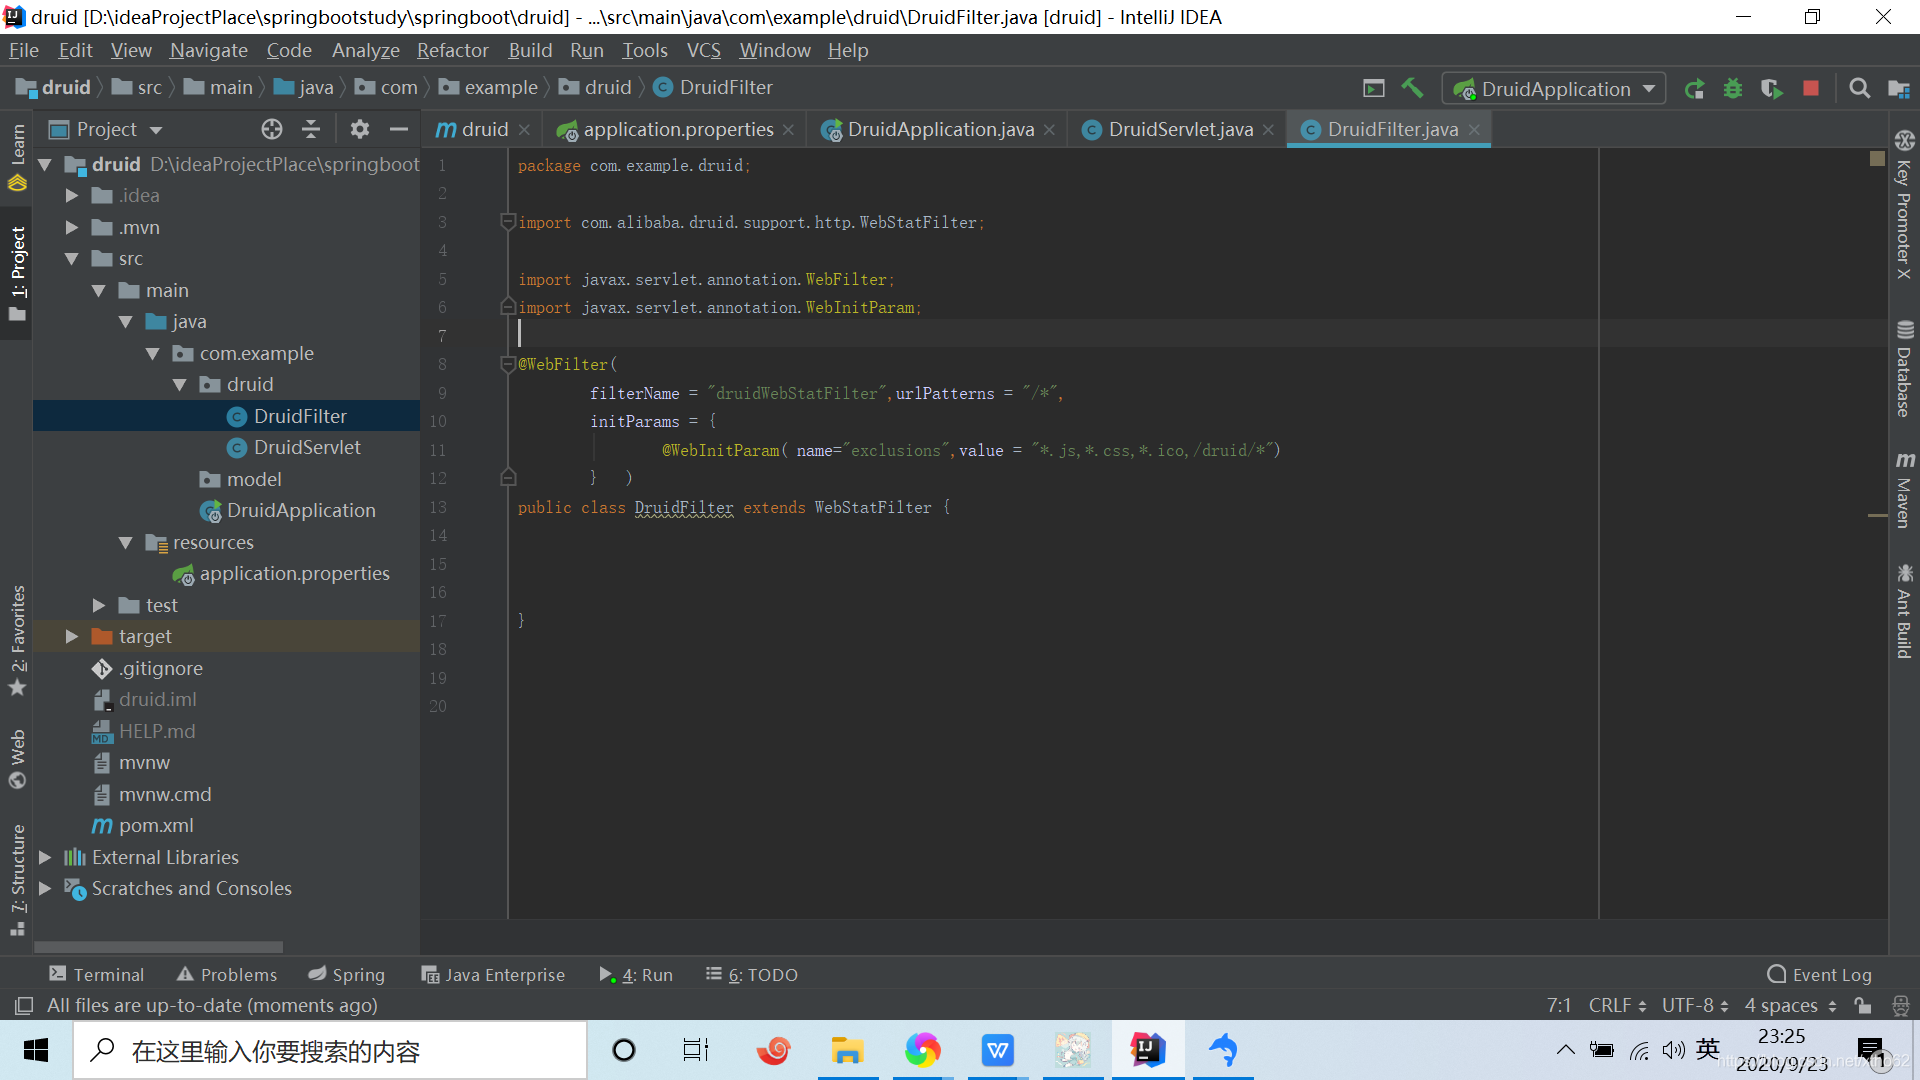
由于druid的监控页面是使用的servlet,所以必须有servlet,而且要开启扫描否则无法访问druid后台监控页面。
以下是pom:
<?xml version="1.0" encoding="UTF-8"?> <project xmlns="http://maven.apache.org/POM/4.0.0" xmlns:xsi="http://www.w3.org/2001/XMLSchema-instance" xsi:schemaLocation="http://maven.apache.org/POM/4.0.0 https://maven.apache.org/xsd/maven-4.0.0.xsd"> <modelVersion>4.0.0</modelVersion> <parent> <groupId>org.springframework.boot</groupId> <artifactId>spring-boot-starter-parent</artifactId> <version>2.3.1.RELEASE</version> <relativePath/> <!-- lookup parent from repository --> </parent> <groupId>com.example</groupId> <artifactId>druid</artifactId> <version>0.0.1-SNAPSHOT</version> <name>druid</name> <description>Demo project for Spring Boot</description> <properties> <java.version>1.8</java.version> </properties> <dependencies> <dependency> <groupId>org.springframework.boot</groupId> <artifactId>spring-boot-starter</artifactId> </dependency> <dependency> <groupId>org.springframework.boot</groupId> <artifactId>spring-boot-starter-web</artifactId> </dependency> <!--配置druid数据源--> <dependency> <groupId>com.alibaba</groupId> <artifactId>druid-spring-boot-starter</artifactId> <version>1.1.10</version> </dependency> <dependency> <groupId>org.mybatis.spring.boot</groupId> <artifactId>mybatis-spring-boot-starter</artifactId> <version>1.3.2</version> </dependency> <dependency> <groupId>mysql</groupId> <artifactId>mysql-connector-java</artifactId> <version>5.1.47</version> </dependency> <!--<dependency> <groupId>org.springframework.data</groupId> <artifactId>spring-data-jpa</artifactId> <version>2.3.0.RELEASE</version> </dependency> --> <dependency> <groupId>org.springframework.boot</groupId> <artifactId>spring-boot-starter-test</artifactId> <scope>test</scope> <exclusions> <exclusion> <groupId>org.junit.vintage</groupId> <artifactId>junit-vintage-engine</artifactId> </exclusion> </exclusions> </dependency> <dependency> <groupId>javax.servlet</groupId> <artifactId>javax.servlet-api</artifactId> <version>4.0.1</version> </dependency> </dependencies> <build> <plugins> <plugin> <groupId>org.springframework.boot</groupId> <artifactId>spring-boot-maven-plugin</artifactId> </plugin> </plugins> </build> </project> 启动器代码,注意要加@ServletComponentScan注解不然会404页面
package com.example; import org.springframework.boot.SpringApplication; import org.springframework.boot.autoconfigure.SpringBootApplication; import org.springframework.boot.web.servlet.ServletComponentScan; @ServletComponentScan @SpringBootApplication public class DruidApplication { public static void main(String[] args) { SpringApplication.run(DruidApplication.class, args); } } properties:
# 实体类包路径 mybatis.type-aliases-package=com.example.model spring.datasource.type= com.alibaba.druid.pool.DruidDataSource spring.datasource.url=jdbc:mysql://localhost:3306/mybatis_springboot spring.datasource.username=root spring.datasource.password=root3306 spring.datasource.driver-class-name=com.mysql.jdbc.Driver #初始化大小,最小,最大连接数 spring.datasource.druid.initial-size=3 spring.datasource.druid.min-idle=3 spring.datasource.druid.max-active=10 # 配置获取连接等待超时的时间 spring.datasource.druid.max-wait=60000 #监控后台账户和密码 spring.datasource.druid.stat-view-servlet.login-username=admin spring.datasource.druid.stat-view-servlet.login-password=admin #配置 StatFilter spring.datasource.druid.filter.stat.log-slow-sql=true spring.datasource.druid.filter.stat.slow-sql-millis=2000 配置servlet和filter
package com.example.druid; import com.alibaba.druid.support.http.StatViewServlet; import javax.servlet.annotation.WebInitParam; import javax.servlet.annotation.WebServlet; @WebServlet(urlPatterns = "/druid/*", initParams = { @WebInitParam(name="allow",value = "127.0.0.1"), // @WebInitParam(name="loginUsername",value = "admin",description = "druid用户名"), // @WebInitParam(name="loginPassword",value = "1234",description = "druid密码"), @WebInitParam(name="resetEnable",value = "false") }) public class DruidServlet extends StatViewServlet { private static final long serialVersionUID = 1L; } package com.example.druid; import com.alibaba.druid.support.http.WebStatFilter; import javax.servlet.annotation.WebFilter; import javax.servlet.annotation.WebInitParam; @WebFilter( filterName = "druidWebStatFilter",urlPatterns = "/*", initParams = { @WebInitParam( name="exclusions",value = "*.js,*.css,*.ico,/druid/*") } ) public class DruidFilter extends WebStatFilter { } 启动访问:http://localhost:8080/druid/login.html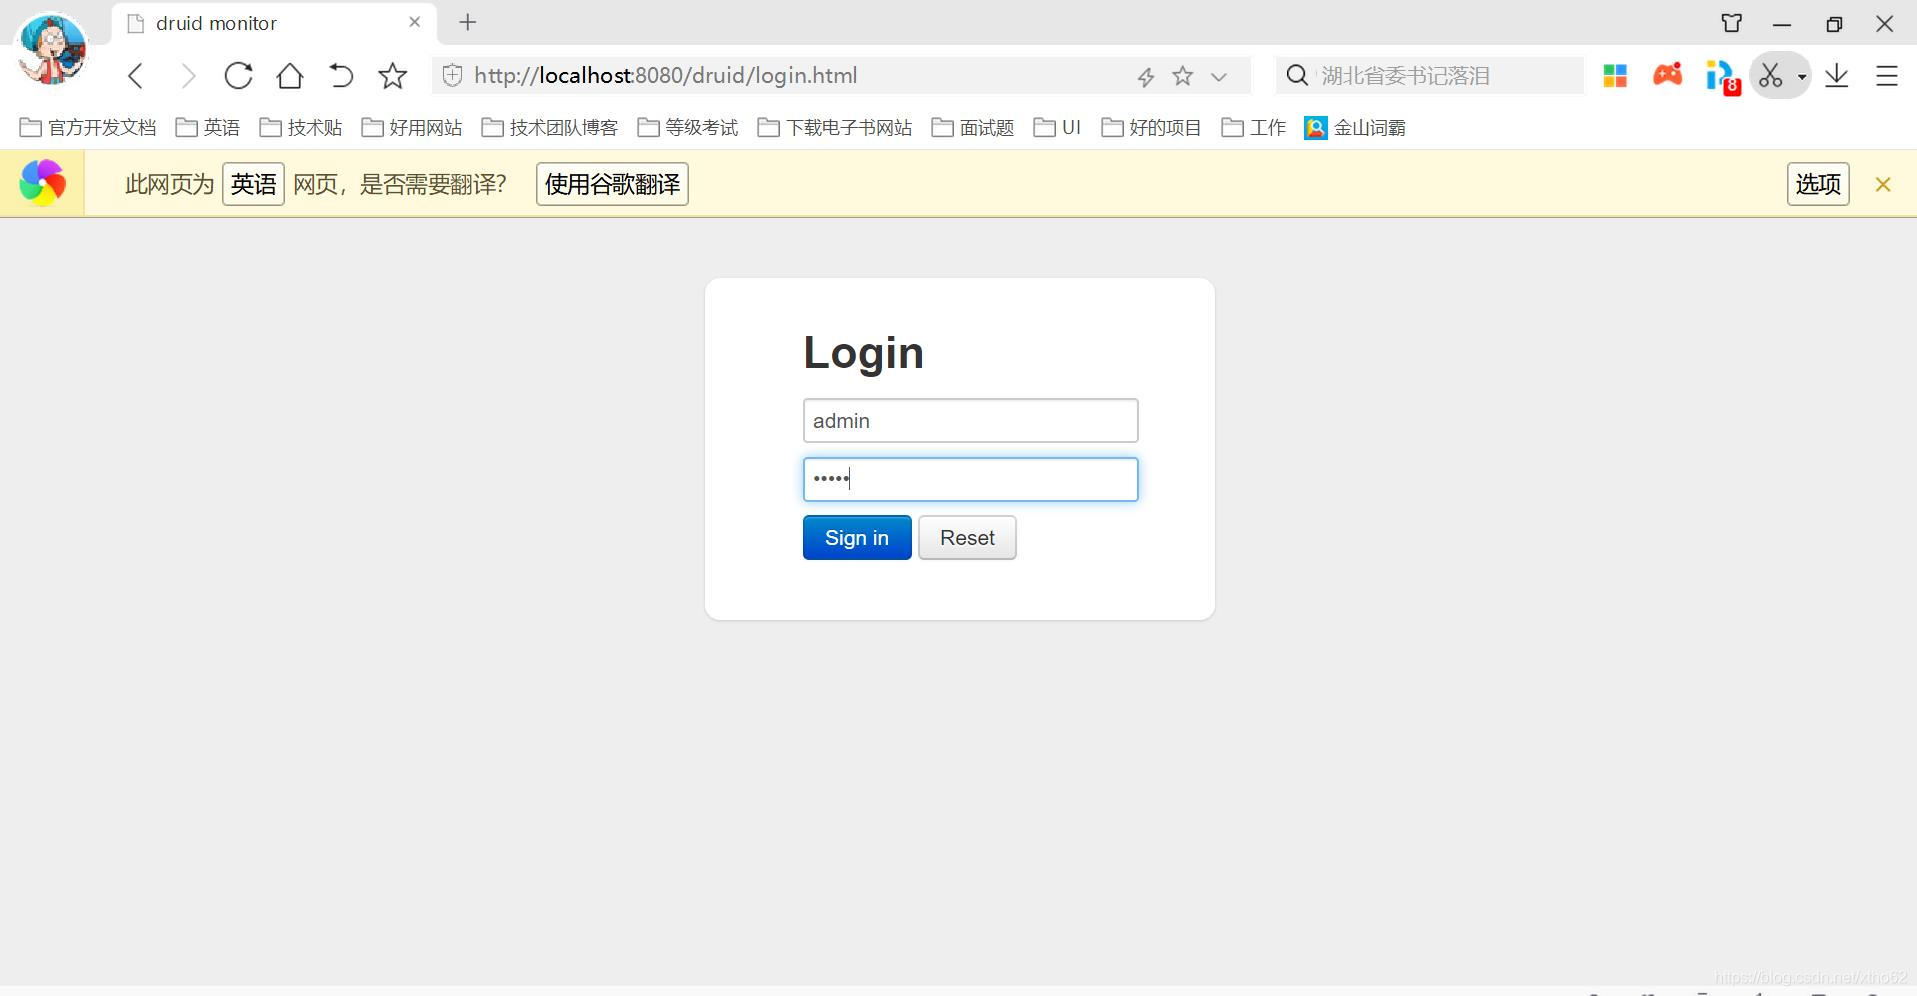
输入配置文件中对应的账户密码登录:本文用的都是admin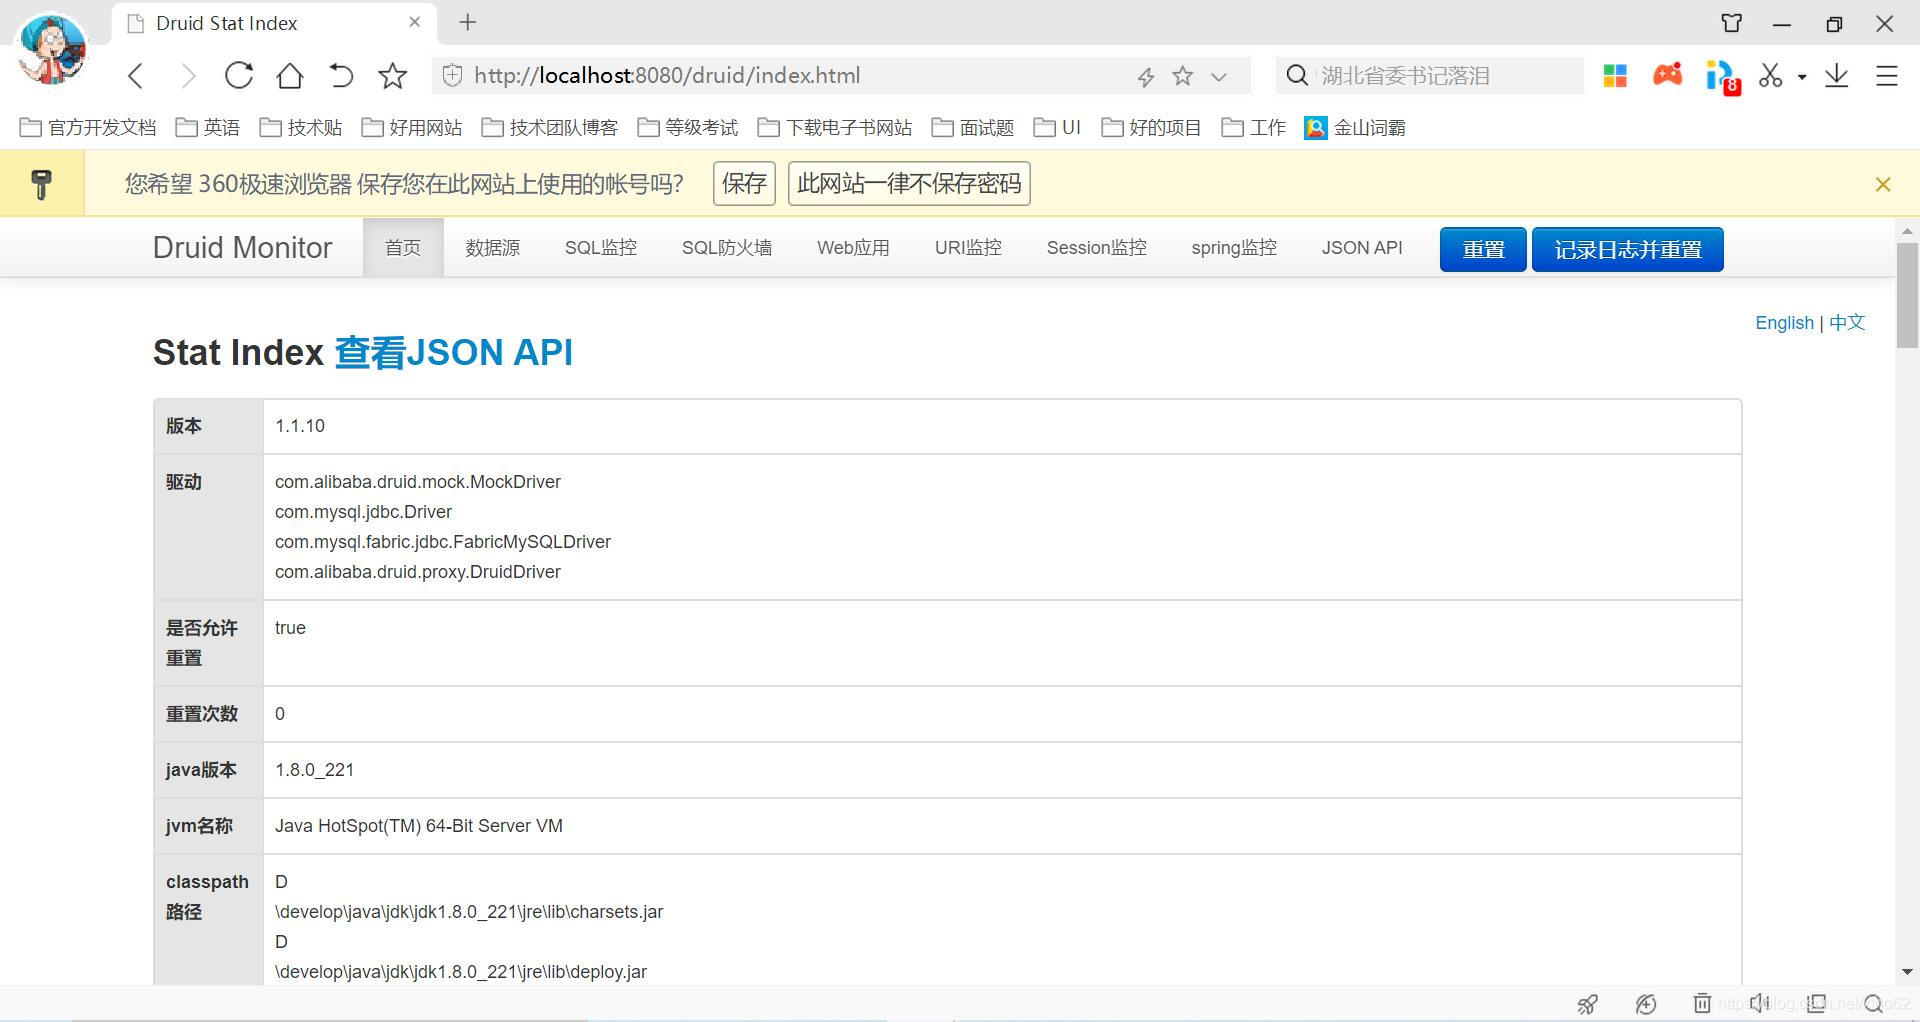
以上就成功使用SpringBoot集成Druid监控数据源了,当然也可以接下来畅快的CURD了。当然我们觉得麻烦,java配置类结合配置文件觉得复杂,想单纯使用配置文件。
#开启servlet后台视图 spring.datasource.druid.stat-view-servlet.enabled=true 配置在properties中即可不用写servlet配置类,在启动类上也不需要写@ServletComponentScan了。
还有通常我们都需要放行一些资源文件,可以使用如下编写。
spring.datasource.druid.web-stat-filter.enabled=true spring.datasource.druid.web-stat-filter.url-pattern=/* spring.datasource.druid.web-stat-filter.exclusions=*.gif,*.png,*.jpg,*.html,*.js,*.css,*.ico,/druid/* 访问后台主页,效果同。
多数据源配置
# 数据源配置 spring: datasource: type: com.alibaba.druid.pool.DruidDataSource driverClassName: com.mysql.cj.jdbc.Driver druid: # 主库数据源 master: url: jdbc:mysql://localhost:3306/ry?useUnicode=true&characterEncoding=utf8&zeroDateTimeBehavior=convertToNull&useSSL=true&serverTimezone=GMT%2B8 username: root password: password # 从库数据源 slave: # 从数据源开关/默认关闭 enabled: false url: username: password: # 初始连接数 initialSize: 5 # 最小连接池数量 minIdle: 10 # 最大连接池数量 maxActive: 20 # 配置获取连接等待超时的时间 maxWait: 60000 # 配置间隔多久才进行一次检测,检测需要关闭的空闲连接,单位是毫秒 timeBetweenEvictionRunsMillis: 60000 # 配置一个连接在池中最小生存的时间,单位是毫秒 minEvictableIdleTimeMillis: 300000 # 配置一个连接在池中最大生存的时间,单位是毫秒 maxEvictableIdleTimeMillis: 900000 # 配置检测连接是否有效 validationQuery: SELECT 1 FROM DUAL testWhileIdle: true testOnBorrow: false testOnReturn: false webStatFilter: enabled: true statViewServlet: enabled: true # 设置白名单,不填则允许所有访问 allow: url-pattern: /druid/* # 控制台管理用户名和密码 login-username: login-password: filter: stat: enabled: true # 慢SQL记录 log-slow-sql: true slow-sql-millis: 1000 merge-sql: true wall: config: multi-statement-allow: true 更多学习,各种参数配置请参考druid官方。
https://github.com/alibaba/druid/tree/master/druid-spring-boot-starter
热门文章
- 「3月19日」最高速度22.7M/S,2025年V2ray/Clash/Shadowrocket/SSR每天更新免费机场订阅链接
- 被2.3个月小猫咬了出血不打疫苗可以吗(被23个月小猫咬了破皮)
- 编译python(cpython)的源码及其用途
- 「4月5日」最高速度21M/S,2025年SSR/Shadowrocket/V2ray/Clash每天更新免费机场订阅链接
- 国内排名前十的兽药厂家 国内排名前十的兽药厂家有哪些
- 「3月4日」最高速度21.8M/S,2025年SSR/V2ray/Shadowrocket/Clash每天更新免费机场订阅链接
- 宠颐生动物中心医院怎么样(宠颐生动物医院方庄店)
- 炸酱面的炸鸡蛋酱怎么做(炸酱面怎样鸡蛋炸酱)
- 猫打了猫瘟疫苗还会染上猫瘟吗(猫打了猫瘟疫苗还会染上猫瘟吗)
- 开宠物用品店的优势和劣势有哪些方面(开宠物用品店需要具备哪些条件)